-
Overview
-
Getting started
-
Assembly
-
Setup (headset and controllers)
-
Setup (play area)
-
Basics
-
Mixed reality
-
Additional accessories
-
-
Managing screenshots, files, and apps
- Connecting the headset to your computer
- Transferring screenshots and screen recordings to your computer
- Browsing and viewing files
- Viewing 360° photos
- Connecting an external storage device to the headset
- Transferring files between the headset and an external storage device
- Installing apps on the headset
- Installing APK files on the headset
- Uninstalling apps
- Changing app permissions
-
Using VIVE Manager
-
Sharing and streaming content
-
Settings
- Connecting to a Wi-Fi network
- Setting a device passcode
- Installing system and firmware updates
- Resetting your headset (factory reset)
- Adjusting the power frequency
- Choosing a display mode
- Setting a timeout for sleep mode
- Adjusting audio settings
- Choosing a tracking mode
- Pairing Bluetooth devices
- Setting up and using Kiosk mode
- Adding a VPN connection
-
VIVE XR Elite for Business
-
Solutions and FAQs
-
General
-
Hardware
- What should I do when the headset is unable to detect the controllers?
- How do I check the battery level of the headset and controllers?
- Why isn't the battery percentage displaying correctly?
- Why does my headset turn off when it's connected to a power bank?
- Why won't the headset turn on?
- How long is the USB-C to USB-C cable that comes with the headset?
- Can I connect a wired USB-C audio device to the headset?
-
Apps and content
-
- Contact Us
Microsoft Intune
Enrolling VIVE XR Elite in Microsoft Intune
To enroll your VIVE XR Elite in Microsoft Intune, you'll need to first create a device enrollment token in Microsoft Endpoint Manager. After creating a device enrollment token, scan the enrollment token (QR code) using VIVE XR Elite to enroll the headset. See the following for details:
After enrolling your headset, if you create a device lock PIN or password in Microsoft Intune, the PIN or password will be limited to 4-8 numeric characters per the device lock passcode requirements of VIVE XR Elite.
Creating a device enrollment token
- In your computer's web browser, go to https://endpoint.microsoft.com/. You may need to sign in with your Microsoft account.
- Go to Devices > Enrollment > Android .
-
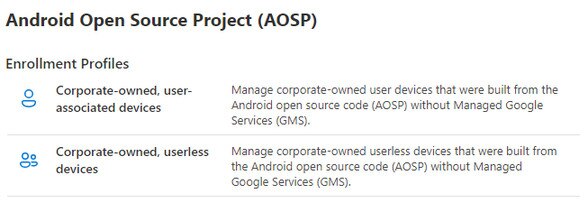
Select the enrollment profile that matches your requirements.
- Corporate-owned, user-associated devices
- Corporate-owned, userless devices
-
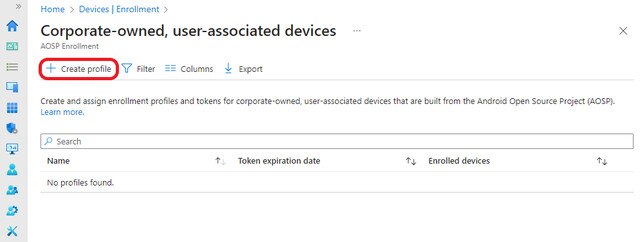
On the corresponding enrollment page, click
+ Create profile.
-
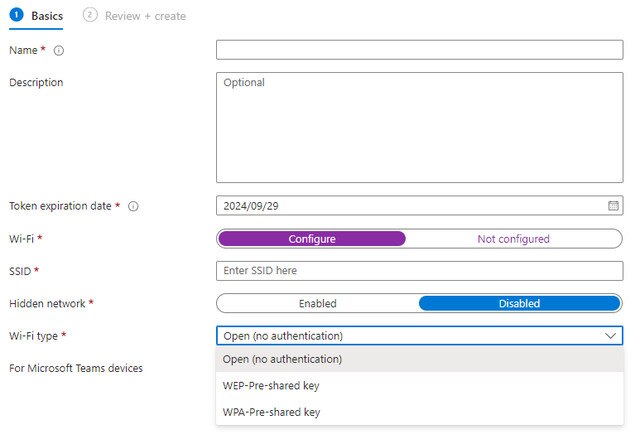
Specify the details of your profile and click
Next.
 Note:
Note:A Wi-Fi connection is required. You won't be able to enroll if your device isn't connected to a Wi-Fi network.
- Review your profile information and click Create.
-
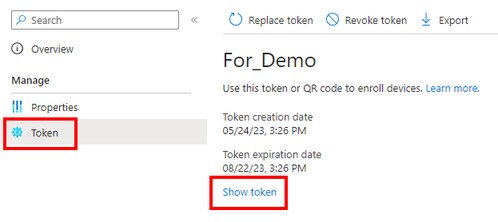
Open your profile page and click
Token > Show token.
The enrollment token's QR code will be displayed.
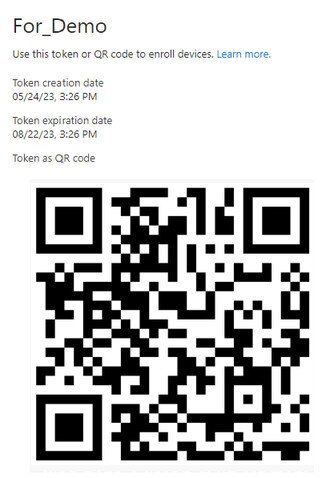
Keep this page open as you'll need to scan the QR code with your headset to enroll it and set it up for Microsoft Intune. Also, zoom in on the webpage to make the QR code bigger. See Enrolling the headset and setting it up for Microsoft Intune.
Enrolling the headset and setting it up for Microsoft Intune
- Scanning a QR code
- Uploading a Mobile Device Management (MDM) solution
Once you're done enrolling your headset, you can set it up.
Enrolling your headset by scanning a QR code
- From Home, select Settings > Advanced > MDM setup > QR code.
-
Use the onscreen QR code scanner to scan the QR code displayed on your computer screen. Make sure the code fits just inside the scanning area and hold steady until you've scanned the code successfully.

Uploading a Mobile Device Management (MDM) solution
The steps below that describe how to upload an MDM solution using VIVE Business+ can be found in the VIVE Business+ User Guide. See Uploading a Mobile Device Management (MDM) solution.
- In VIVE Business+, click Manage files > Management solution.
- Click Add and select Microsoft Intune.
- Under Upload MDM files, click Browse and upload the Microsoft agent APK file associated with the device enrollment token JSON file. You can download the APK file from the URL provided in the JSON file under "android.app.extra.PROVISIONING_DEVICE_ADMIN_PACKAGE_DOWNLOAD_LOCATION".
- Under Credentials configuration file (.json), click Browse and upload the device enrollment token JSON file.
- Click Add.
-
Create a group with Assign manager solution selected and have your headset assigned.
- Create a group. See Creating groups.
- Select Assign manager solution on the Manage devices screen.
- Add your device to the group. See Adding devices to a group.
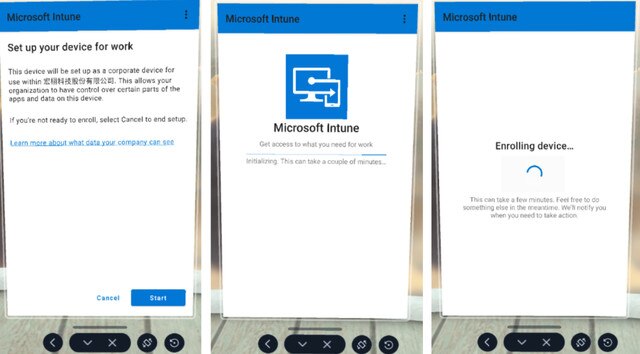
Setting up your device
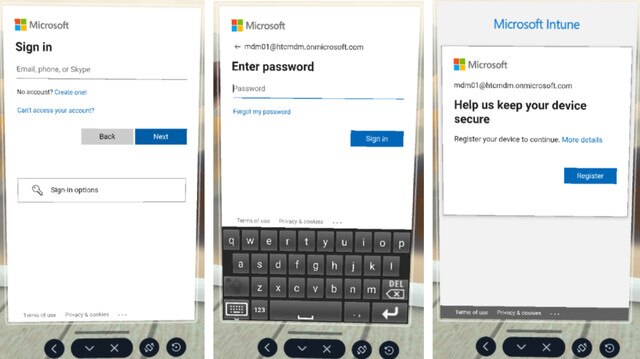
- The MDM Setup window will appear. The Microsoft Intune agent will then automatically enroll the headset. When enrollment is complete, follow the onscreen instructions to finish setting up the headset. What you do next will depend on the enrollment profile you selected when creating the device enrollment token.
-
If you're using a user-associated device, you'll need to sign in and register your device first.
-
If you're using a userless device, you can proceed directly to device setup. Just select
Start.
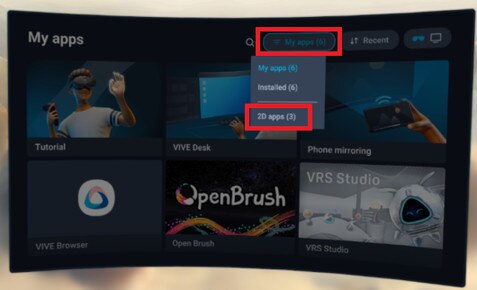
 Tip: If the headset restarts during setup or setup is interrupted for some other reason, you can resume setup from the Library. First, go to the Library, select the filter button
 , and then select
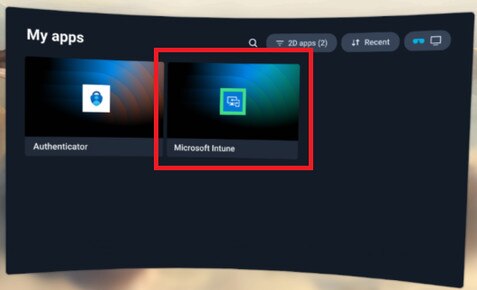
2D apps.
Select Microsoft Intune to resume device setup.
, and then select
2D apps.
Select Microsoft Intune to resume device setup.