-
Overview
-
Getting started
-
Hardware
-
Setup (headset and controllers)
-
Setup (play area)
-
Basics
-
Mixed reality
-
Additional accessories
-
-
Managing screenshots, files, and apps
- Connecting the headset to your computer
- Transferring screenshots and screen recordings to your computer
- Browsing and viewing files
- Viewing 360° photos
- Connecting an external storage device to the headset
- Copying files between the headset and external storage
- Installing apps on the headset
- Installing APK files on the headset
- Uninstalling apps
- Changing app permissions
-
Using VIVE Manager
-
Sharing and streaming content
-
Settings
- Setting a device passcode
- Connecting to a Wi-Fi network
- Adding a VPN
- Adjusting the power frequency
- Adjusting audio settings
- Choosing a display mode
- Turning night mode on and off automatically
- Choosing a tracking mode
- Pairing Bluetooth devices
- Setting up and using Kiosk mode
- Installing system and firmware updates
- Resetting the headset (factory reset)
-
VIVE Focus Vision for Business
-
Solutions and FAQs
-
General
-
Headset and controllers
-
Play area
-
Eye tracking and IPD
-
- Contact Us
Setting up your headset for the first time
The easiest way to set up
VIVE Focus Vision is with
VIVE Manager.
To find out where you can download VIVE Manager, see What phones does VIVE Manager support, and how do I get the app?. For more details about the app, see About VIVE Manager.
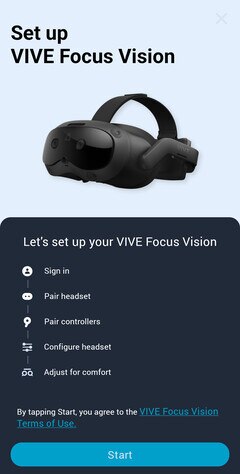
Here's how to set up VIVE Focus Vision with VIVE Manager:
- Turn on your headset.
- Launch VIVE Manager on your phone. Read the permissions needed by VIVE Manager and tap OK.
-
On the
Welcome screen, select
VIVE Focus Vision > Next.
Note: If you haven't installed the battery and turned on the headset, follow the onscreen instructions.
- Follow the onscreen prompts to grant permission to VIVE Manager.
-
Tap
Start to begin setting up your headset.

- Sign in with your HTC account, or create a new account using your email address or phone number.
-
Follow the onscreen instructions to set up the following:
Task Steps Pair VIVE Manager with your headset When your headset receives a pairing request from VIVE Manager, the front headset LED will flash white. When the LED starts flashing, press the headset button. Choose a Wi-Fi network Connect your headset to a Wi-Fi network by entering the login credentials or scanning a Wi-Fi QR code. Note: If you select a corporate or public network that requires connecting through their login page, you'll need to complete the login process in the headset.
Pair controllers Turn on the controllers. The headset can automatically pair with the controllers that came in the box. You can also pair controllers manually. Grant access permissions to allow phone mirroring (Android phones only) In Accessibility Services and Modify system settings, tap Grant and enable these permissions. Tip: After granting a permission, tap the back arrow until you're on the VIVE Manager screen again.
- If there's a system update available, make sure to install it to get the latest features and enhancements. After installing the system update, tap Restart in VIVE Manager to restart the headset.
- Read the Health and safety reminders and tap I understand.
- On the Putting on the headset screen, watch how to put on the headset and then tap Close.
- Put on your headset to finish setting up the headset. Follow the instructions on the headset to adjust the IPD and volume, and set up your play area. You can also refer to the following topics:
Tip:
- If you have trouble pairing the headset, make sure it's powered on and near your phone.
- If VIVE Manager isn't available, you can set up your headset manually by pressing and holding the headset button from the Welcome screen.
Was this helpful?
Yes
No
Submit
Thank you! Your feedback helps others to see the most helpful information.