-
Getting started
- About VIVE Business+
- Setting up your devices with VIVE Business+
- Signing in to VIVE Business+
- Creating an organization
- Changing the HTC ID for an organization
- Activating VIVE Business Warranty and Services (BWS)
- Registering several devices with VIVE Business Warranty and Services (BWS)
- Enrolling devices
- Generating a QR code to enroll devices
- Setting up a group of devices
- Checking tasks performed by users
- Accessing the VIVE Forum
-
Managing users
-
Managing devices
- Managing your devices
- Exporting a list of enrolled devices
- Exporting maps and map boundary data
- Editing map details
- Deleting maps and map boundary data
- Deleting a map on the headset
- Creating groups
- Editing group settings
- Adding devices to a group
- Assigning users to a private group
- Assigning maps
- Remotely launching an app
- Mirroring a headset to VIVE Business+
- Switching the Wi-Fi connection
- Adding more seat licenses and extending organization tier validity
- Releasing a seat license
- Reporting an issue
-
Managing contents
- Uploading media files to VIVE Business+
- Editing and deleting media files
- Uploading apps to VIVE Business+
- Adding unmanaged apps to VIVE Business+
- Installing apps on a group of devices
- Editing and deleting apps
- Assigning an EMM app with device owner permissions
- Uploading a Mobile Device Management (MDM) solution
- Uploading other Mobile Device Management (MDM) solutions
- Editing and deleting the management solution app
-
Batch configuration
-
VIVE Business+ console
- About the VIVE Business+ console
- Downloading the VIVE Business+ console
- Setting up the VIVE Business+ console
- Reporting an issue through the VIVE Business+ console
- Creating a batch configuration package for your headset
- Importing maps and batch configuration packages to headsets
- Exporting maps from devices
- Connecting headsets wirelessly
- Enrolling headsets via USB
- Setting VIVE Ultimate Tracker to Wi-Fi LBE mode
- Setting VIVE Ultimate Tracker to standard LBE mode
- Setting VIVE Ultimate Tracker to VO mode
- Creating a batch configuration package for VIVE Ultimate Tracker
- Importing maps and batch configuration packages to trackers
- Enrolling VIVE Ultimate Tracker via USB
- Connecting VIVE Ultimate Tracker wirelessly
- Creating a tracker server
- Updating the system software of VIVE Ultimate Tracker
- Resetting the tracker
-
Completing common tasks
-
Solutions and FAQs
- Can I extend the duration of my trial organization tier?
- Can I upgrade my trial organization tier to Pro or Ultimate?
- How do I check if the batch configuration package was installed?
- What happens to a device when the license expires?
- Why were apps uninstalled from a device?
- How do I set a fixed Wi-Fi MAC address?
- What permissions does each VIVE Business+ role have?
- What should I do if VIVE Business+ settings are not applied?
- What should I do if I see "No more device Seats quote" when trying to enroll VIVE Ultimate Tracker?
- What should I do if I can't connect my tracker wirelessly to the computer?
-
Appendix
- Contact Us
Downloading the VIVE Business+ console
Download the
VIVE Business+ console and the USB Driver to manage your fleet of devices offline.
-
In
VIVE Business+, go to
Dashboard and click
 in
VB+ console.
in
VB+ console.
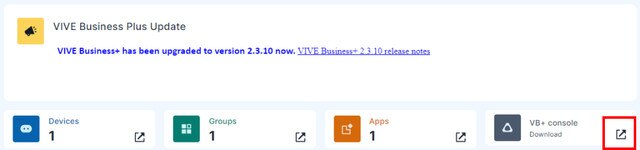 Tip: You can also go to Download on the left panel to download VIVE Business+ console.
 -
Download the USB driver and
VIVE Business+ console.
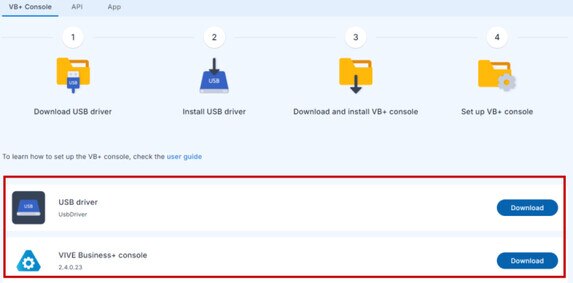 Important: If you have an older version of VIVE Business+ console, delete all the files of the older version.
 -
Install the USB driver on your computer.
- Extract UsbDriver.zip.
-
Right-click
android_winusb.inf and select
Install.
A confirmation dialog will appear.
 Note: Make sure VIVE Streaming Hub and VIVE Business Console aren't running when you install the USB driver.
Was this helpful?
Yes
No
Submit
Thank you! Your feedback helps others to see the most helpful information.