-
Introduction
-
Tracking modes
-
ArUco markers and marker-based tracking features
-
ArUco markers
-
Marker-based tracking features
-
-
Marker-Based Location Sharing setup
- Setting up Marker-Based Location Sharing
- Creating ArUco markers for Marker-Based Location Sharing
- Aligning the height of a virtual scene using an ArUco marker
- Moving a user to a specific point in a virtual scene
- Setting up Marker-Based Location Sharing with VIVE Business Streaming
- Marker-Based Location Sharing APIs (AIO)
- Marker-Based Location Sharing APIs (PC VR)
-
LBE Mode/LBE Hybrid Mode setup
-
LBE map configuration
-
Marker-Based Drift Prevention setup
-
Marker-Based Advanced Relocation setup
-
Marker-Based Scene Alignment setup
- Setting up Marker-Based Scene Alignment
- Configuring the position of an ArUco marker in a virtual scene (Unity)
- Creating ArUco markers for Marker-Based Scene Alignment
- Setting up Marker-Based Scene Alignment with VIVE Business Streaming
- Marker-Based Scene Alignment APIs (AIO)
- Marker-Based Scene Alignment APIs (PC VR)
-
Simulator VR Mode setup
- Setting up Simulator VR Mode
- Pairing wrist trackers with a headset
- Installing an anchor controller or tracker in a VR simulator
- Coordinate alignment
- Anchor controller and tracker origin points
- Aligning VR and anchor coordinate systems using a VR controller
- Aligning VR and anchor coordinate systems using an ArUco marker
- Simulator VR Mode FAQs
-
Other services
-
Additional features
- Contact Us
Setting up Marker-Based Location Sharing
Create
ArUco markers for
Marker-Based Location Sharing and set them up in your play area.
This topic explains how to set up Marker-Based Location Sharing for AIO devices. Additional steps are required to use Marker-Based Location Sharing with PC VR headsets. For details on using Marker-Based Location Sharing for PC VR, see Setting up Marker-Based Location Sharing with VIVE Business Streaming.
Note:
- Marker-Based Location Sharing can only be used with headsets enrolled in VO Mode.
- You can use one or two ArUco markers with Marker-Based Location Sharing.
- When setting up Marker-Based Location Sharing with two ArUco markers, your play area should be at least 150 square meters.
- Set up the headsets you'll use in the play area. See Setting up the headsets.
- Create your ArUco markers. See Creating ArUco markers for Marker-Based Location Sharing.
- Configure your VR application using the Marker-Based Location Sharing APIs. See Marker-Based Location Sharing APIs (AIO) for details.
- Optional: Set the tracking origin of your virtual scene. This will be used to align the height of the virtual scene according to the height of the marker you create. See Aligning the height of a virtual scene using an ArUco marker for details.
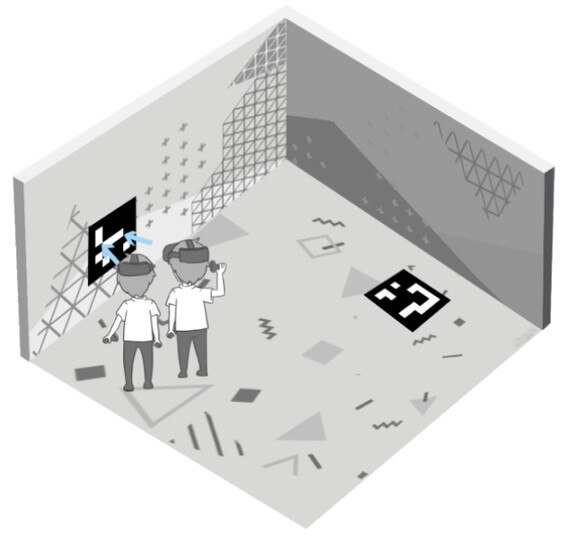
- Place the primary marker in your play area in a central location. You can put it on the floor or wall, as long as it is clearly visible.
- If you're using two markers, place the secondary marker in the play area. Make sure it's at least 150 cm away from the primary marker.
- Take your headset to the play area and put it on. The headset should wake from standby mode.
-
Scan the primary marker. Make sure to stand up straight and keep your head steady while scanning.
-
If you're using two markers, scan the secondary marker.
Location sharing will start automatically. Each player's position will be aligned by the headset tracking engine.
Tip: If you lose tracking after location sharing starts, try moving backward and forward to restore tracking. If tracking isn't restored immediately, scan the ArUco markers again to reset your position.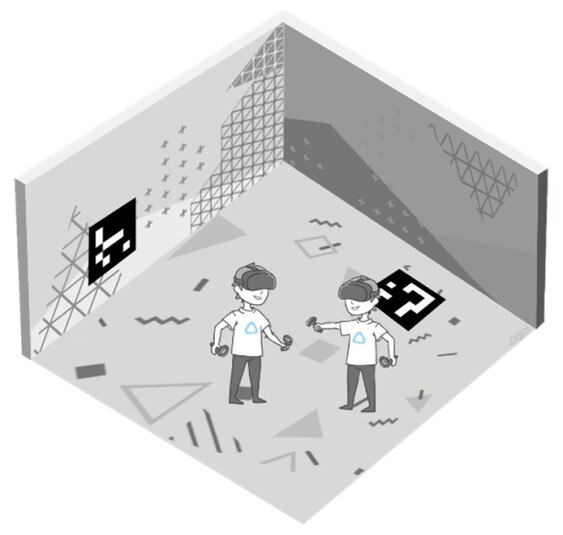 Note:
Note:- After you scan one or both markers (depending on your setup), marker detection will be disabled on the headset. You can re-enable marker detection with the scan marker API.
- When you exit an application during play, location sharing will stop and your position will reset. You can resume location sharing after reopening the application with the resume location sharing API.
See Marker-Based Location Sharing APIs (AIO) for details.
Was this helpful?
Yes
No
Submit
Thank you! Your feedback helps others to see the most helpful information.