-
入门
-
管理用户
-
管理设备
-
管理内容
-
批量配置
-
VIVE Business+ 控制台
- 关于 VIVE Business+ 控制台
- 下载 VIVE Business+ 控制台
- 设置 VIVE Business+ 控制台
- 通过 VIVE Business+ 控制台报告问题
- 为头戴式设备创建批量配置包
- 将地图和批量配置包导入头戴式设备
- 从设备导出地图
- 以无线方式连接头戴式设备
- 通过 USB 登记头戴式设备
- 将 VIVE 自定位追踪器设置为 Wi-Fi LBE 模式
- 将 VIVE 自定位追踪器设置为标准 LBE 模式
- 将 VIVE 自定位追踪器设置为视觉测距 (VO) 模式
- 为 VIVE 自定位追踪器创建批量配置包
- 将地图和批量配置包导入追踪器
- 通过 USB 登记 VIVE 自定位追踪器
- 以无线方式连接 VIVE 自定位追踪器
- 创建追踪器服务器
- 更新 VIVE 自定位追踪器的系统软件
- 重置追踪器
-
完成常见任务
-
解决方案和常见问题
-
附录
将应用程序上传到 VIVE Business+
上传应用程序以便将其安装到您的设备上。
重要: 只有订阅了 Ultimate 等级的组织才能访问应用程序和媒体管理功能。要了解更多关于提供的组织等级的信息,请联系您的客户经理。
- 在 VIVE Business+ 中,进入管理内容 > 应用程序。
-
在右上角单击添加 > 已管理。
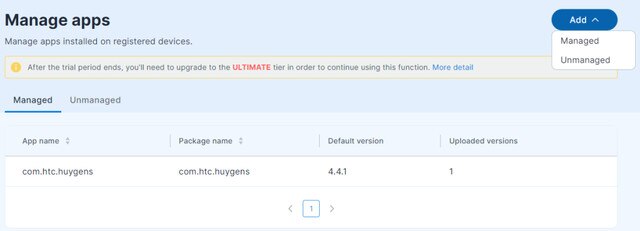
-
在文件下,单击浏览。

-
找到 APK 文件,然后单击打开。
您将看到已输入的 APK 详情。
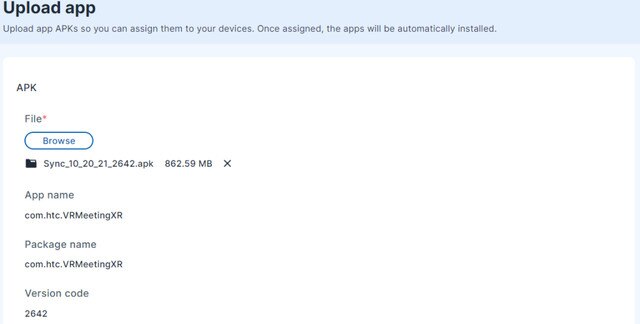 提示: 输入备注以便您可以轻松识别此应用程序。
 -
单击 OBB 旁的 + 以上传扩展文件。
注:
- 添加扩展文件为可选项。
- 要了解有关扩展文件的更多信息,请访问 Android 开发者网站。
-
单击浏览以选择要上传的主 OBB 和补丁 OBB 文件。
重要: OBB 文件名必须遵循以下格式:{main/patch}.{version code}.{package name}.obb.
-
单击上传。
上传应用程序后,您将看到应用程序详情。要更新版本名称,请单击右上角的编辑。
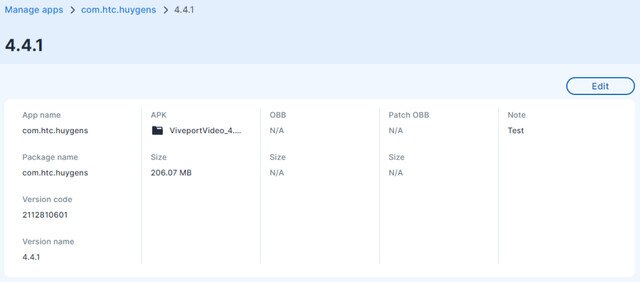
- 单击左上角的管理应用程序以返回应用程序列表。
- 在管理选项卡中,单击您刚上传的应用程序。
-
在应用程序详情页面,单击编辑以设置默认安装版本。
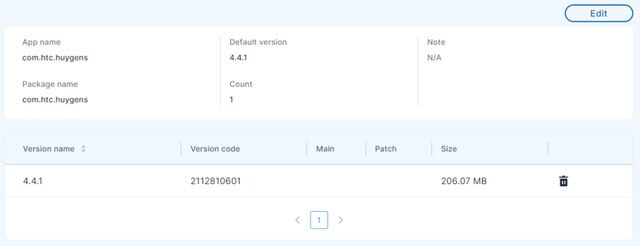 注: 设置默认版本后,您无需每次在设备上安装应用程序时选择版本。
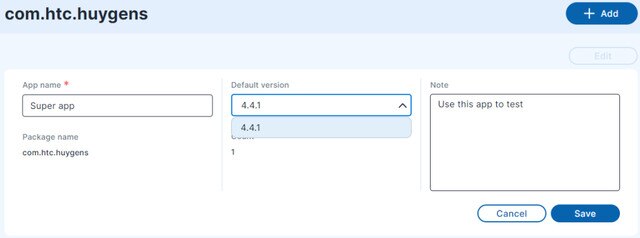
- 单击保存。
此内容对您有帮助吗?
是
否
提交
谢谢!您的反馈可以帮助其他人了解最有用的信息。