-
Introduction
-
Tracking modes
-
ArUco markers and marker-based tracking features
-
ArUco markers
-
Marker-based tracking features
-
-
Marker-Based Location Sharing setup
- Setting up Marker-Based Location Sharing
- Creating ArUco markers for Marker-Based Location Sharing
- Aligning the height of a virtual scene using an ArUco marker
- Moving a user to a specific point in a virtual scene
- Setting up Marker-Based Location Sharing with VIVE Business Streaming
- Marker-Based Location Sharing APIs (AIO)
- Marker-Based Location Sharing APIs (PC VR)
-
LBE Mode/LBE Hybrid Mode setup
-
LBE map configuration
-
Marker-Based Drift Prevention setup
-
Marker-Based Advanced Relocation setup
-
Marker-Based Scene Alignment setup
- Setting up Marker-Based Scene Alignment
- Configuring the position of an ArUco marker in a virtual scene (Unity)
- Creating ArUco markers for Marker-Based Scene Alignment
- Setting up Marker-Based Scene Alignment with VIVE Business Streaming
- Marker-Based Scene Alignment APIs (AIO)
- Marker-Based Scene Alignment APIs (PC VR)
-
Simulator VR Mode setup
- Setting up Simulator VR Mode
- Pairing wrist trackers with a headset
- Installing an anchor controller or tracker in a VR simulator
- Coordinate alignment
- Anchor controller and tracker origin points
- Aligning VR and anchor coordinate systems using a VR controller
- Aligning VR and anchor coordinate systems using an ArUco marker
- Simulator VR Mode FAQs
-
Other services
-
Additional features
- Contact Us
Calibrating the cameras on the primary headset
For VIVE Focus 3 headsets with system version 6.0.999.972 (FOTA 6.3) or earlier, camera calibration needs to be performed via the Android Debug Bridge (ADB) utility. The steps below show how to use ADB to calibrate cameras.
-
Check the calibration status of the headset cameras.
- Turn on your computer and open the Windows Command Prompt.
-
Connect the headset to your computer and turn it on. Right after the headset turns on, execute the following command in the command prompt:
adb logcat | find "_calib_data.json"
If the headset cameras are calibrated, the following message will appear:
HD : HMD calibration file: /data/tracking_calib_data.json, size:
If you see this message, skip to Creating a map with VIVE Manager and start creating your map.
If the headset cameras are not calibrated, the following message will appear:
HD : HMD calibration file: /mnt/vendor/mfg/Final_calib_data.json, size:
If you see this message, continue with the following steps to calibrate the headset cameras.
- Execute the following command in the command prompt: adb logcat -s "LIVEK adsprpc"|findstr "LIVEK doLiveK"
-
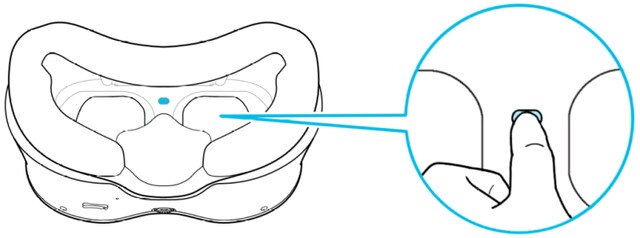
Cover the proximity sensor with a piece of tape and then hold the headset in front of you, facing outward.
Stand still until you're prompted to begin camera calibration. When the system is ready to collect data, the following message will appear:
[doLiveK] LIVEK prepare to collect data. Please use HMD look around.
-
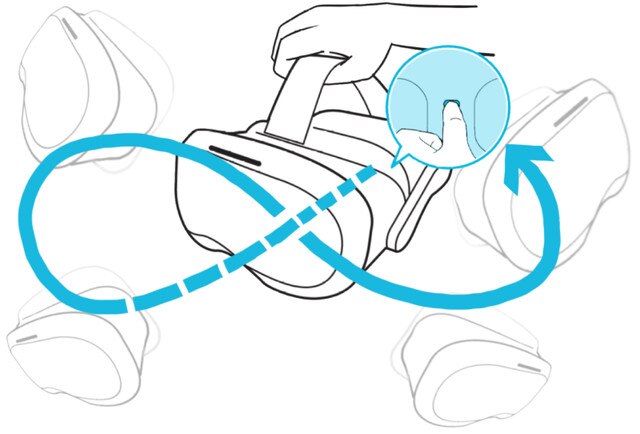
Move the headset around slowly to scan the environment. Start with upward and downward movements, and then turn the headset in different directions. Slower movements will improve data collection.
Tip:
Trace a figure eight with the headset for better results. You can also turn the headset upside down to increase the scope of the scan.
The number of good poses will increase with more dynamic movements. Move the headset around until you see the message "good pose 600":
[doLiveK] LIVEK good pose 100
[doLiveK] LIVEK good pose 200
[doLiveK] LIVEK good pose 300
…
[doLiveK] LIVEK good pose 600
-
Continue moving the headset around until enough data has been collected for calibration. When you've collected enough data, the following message will appear:
[doLiveK] LIVEK pose enough.
Note: If the "pose enough" message doesn't appear, continue scanning until it does. -
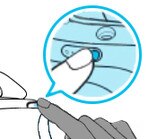
Put the headset aside and double-press the power button to put it into standby mode.
The headset will start processing the data, which will take about 2 or 3 minutes. When data processing is complete, the following confirmation message will appear, indicating that calibration was successful:
[LIVEK] We use new extrinsic instead of original extrinsic.
Note:If the message [doLiveK] LiveKUseTime tempLiveK LiveKPause exists, LiveK pause appears after the headset enters standby mode, you'll need restart the headset to finish calibration.
If the confirmation message doesn't appear, you'll have to restart the calibration process.
After finishing camera calibration, pair the primary VIVE Focus 3 headset with VIVE Manager, then create your virtual map.