请选择您的所在地
Australia
Österreich
België
Canada
Canada - Français
中国
Česká republika
Denmark
Deutschland
France
HongKong
Iceland
Ireland
Italia
日本
Korea
Latvija
Lietuva
Lëtzebuerg
Malta
المملكة العربية السعودية (Arabic)
Nederland
New Zealand
Norge
Polska
Portugal
Russia
Saudi Arabia
Southeast Asia
España
Suisse
Suomi
Sverige
台灣
Ukraine
United Kingdom
United States
请选择您的所在地
België
Česká republika
Denmark
Iceland
Ireland
Italia
Latvija
Lietuva
Lëtzebuerg
Malta
Nederland
Norge
Polska
Portugal
España
Suisse
Suomi
Sverige

Calibrating the cameras on the primary headset

Calibrate the cameras on the primary headset before creating a map to optimize tracking performance.
Note: Make sure the headset is charged to at least 50% before proceeding.
  1. Check the calibration status of the headset cameras.
    1. Turn on your computer and open the Windows Command Prompt.
    2. Connect the headset to your computer and turn it on. Right after the headset turns on, execute the following command in the command prompt:

      adb logcat | find "‍_calib_data.json"‍

      If the headset cameras are calibrated, the following message will appear:

      HD : HMD calibration file: /data/tracking_calib_data.json, size:

      If you see this message, skip to Creating a map with VIVE Manager and start creating your map.

      If the headset cameras are not calibrated, the following message will appear:

      HD : HMD calibration file: /mnt/vendor/mfg/Final_calib_data.json, size:

      If you see this message, continue with the following steps to calibrate the headset cameras.

  2. Execute the following command in the command prompt: adb logcat -s "‍LIVEK adsprpc"‍|findstr "‍LIVEK doLiveK"‍
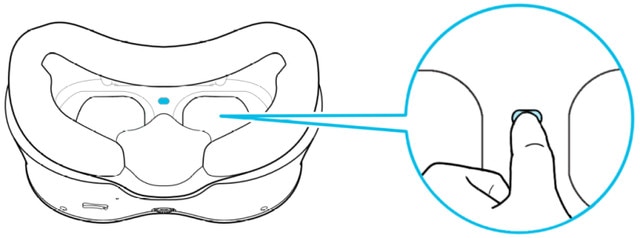
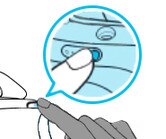
  3. Cover the proximity sensor with a piece of tape and then hold the headset in front of you, facing outward.

    Stand still until you're prompted to begin camera calibration. When the system is ready to collect data, the following message will appear:

    [doLiveK] LIVEK prepare to collect data. Please use HMD look around.

  4. Move the headset around slowly to scan the environment. Start with upward and downward movements, and then turn the headset in different directions. Slower movements will improve data collection.
    Tip:

    Trace a figure eight with the headset for better results. You can also turn the headset upside down to increase the scope of the scan.

    The number of good poses will increase with more dynamic movements. Move the headset around until you see the message "‍good pose 600"‍:

    [doLiveK] LIVEK good pose 100

    [doLiveK] LIVEK good pose 200

    [doLiveK] LIVEK good pose 300

    [doLiveK] LIVEK good pose 600

  5. Continue moving the headset around until enough data has been collected for calibration. When you've collected enough data, the following message will appear:

    [doLiveK] LIVEK pose enough.

    Note: If the "‍pose enough"‍ message doesn't appear, continue scanning until it does.
  6. Put the headset aside and double-press the power button to put it into standby mode.

    The headset will start processing the data, which will take about 2 or 3 minutes. When data processing is complete, the following confirmation message will appear, indicating that calibration was successful:

    [LIVEK] We use new extrinsic instead of original extrinsic.

    Note:

    If the message [doLiveK] LiveKUseTime tempLiveK LiveKPause exists, LiveK pause appears after the headset enters standby mode, you'll need restart the headset to finish calibration.

    If the confirmation message doesn't appear, you'll have to restart the calibration process.

After finishing camera calibration, you're ready to create a virtual map of your play area. Depending on your setup, you can create a virtual map with or without VIVE Manager. See Creating a map with VIVE Manager or Creating a map without VIVE Manager for details.

提交
谢谢!您的反馈可以帮助其他人了解最有用的信息。